KilnAid Guide

Connecting a Genesis Controller to KilnAid

Learn how to set up your Genesis controller with the KilnAid app - instructions in video or step-by-step format!

Connecting a Genesis Controller to KilnAid
Kiln
Greenhouse
Bartlett
Tips & Tricks
By
Molly Dishman
on
May 1, 2021
No items found.

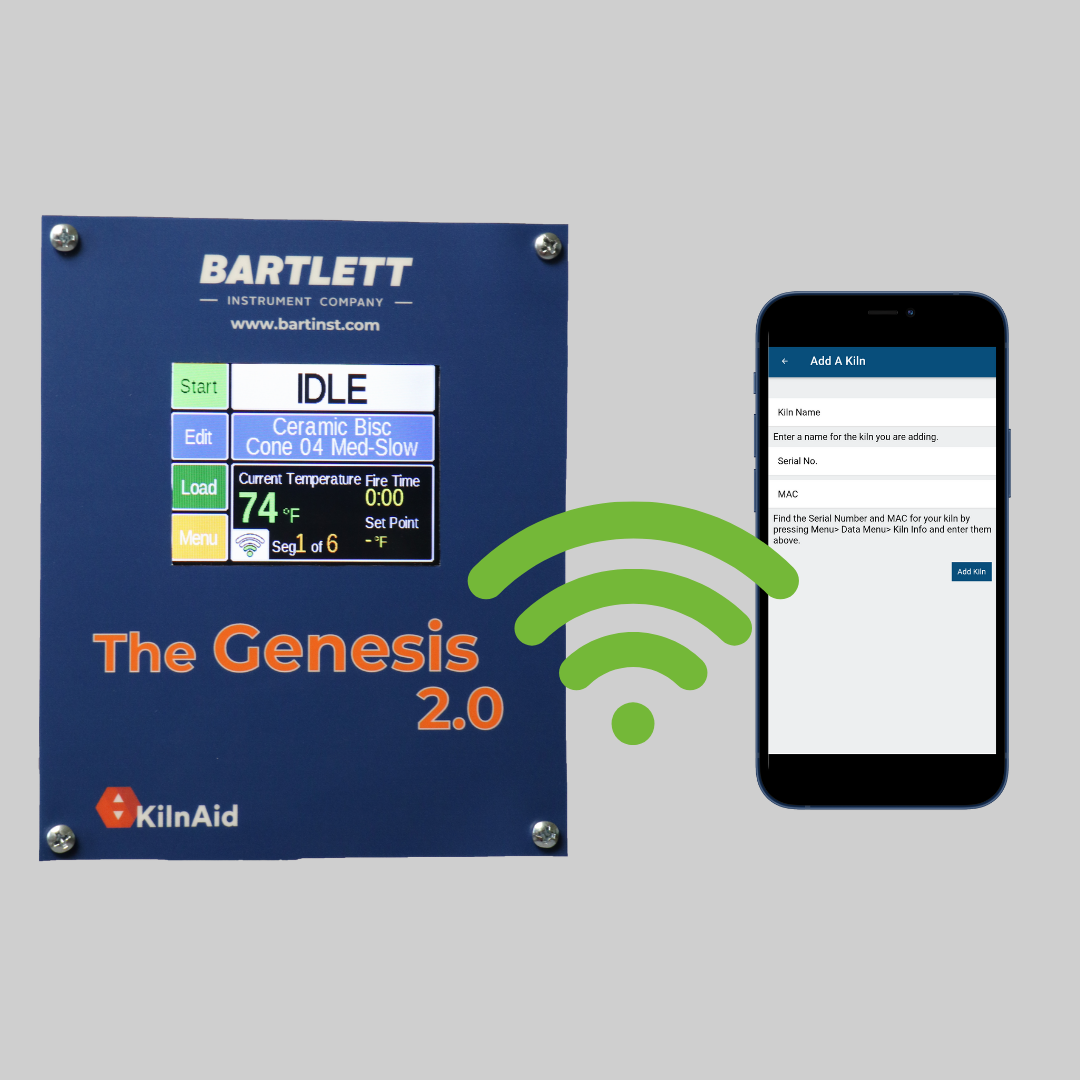
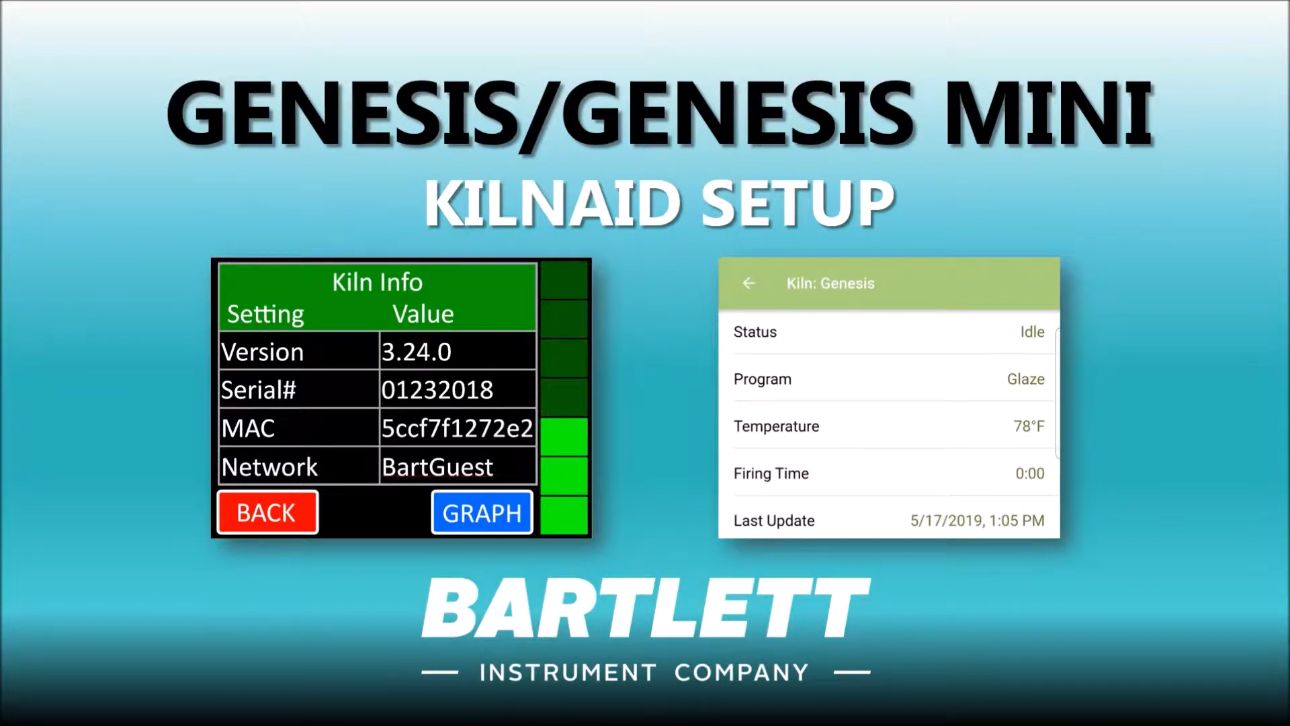
KilnAid Connection Steps

The video below is a step-by-step guide on setting up your controller with KilnAid. If you'd rather read then watch a video, follow the steps below. For additional information on connecting your Genesis controller and KilnAid as well as updating your firmware, subscribe to our YouTube channel!

No items found.

Step 1:

If you haven't already, download KilnAid in the Google Play Store or Apple App Store.

Once downloaded, create an account. After you create an account, you will receive a confirmation email fromsales@bartinst.com with instructions.

If you do not see the email please check your junk mail before calling in for assistance.

No items found.

Step 2:

Next make sure your controller is connected to WiFi. If your controller is not connected it will not send firing information to KilnAid. To connect to WiFi press the following (in order):

  • Menu
  • Configuring
  • Communications
  • WiFi Setup
No items found.

Step 3:

Great! Now your controller is connected to WiFi. We recommend you ensure you have the latest firmware for security and feature updates. To download/update firmware press the following:

  • Menu
  • Configuration
  • Communications
  • Update Firmware
No items found.

Step 4:

Final step - claim your kiln with the app. In your Genesis controller, press the following keys:

  • Menu
  • Data Menu
  • Kiln info

In KilnAid, press the + sign on the top right corner. Enter the serial number, mac address and a name for your kiln to add to your claimed kilns!

No items found.

Have questions? Feel free to ask!

More Greenhouse News

More Kiln News

View All